ApiGatewaySimple#
ApiGateway+apiuser简单示例
安装Ocelot包#
Install-Package Ocelot
Install-Package Ocelot.Provider.Consul      # 如果需要服务发现
Install-Package Ocelot.Provider.Polly       # 熔断支持
Install-Package Microsoft.AspNetCore.Authentication.JwtBearer # JWT验证
ApiGateway#
基础配置 (Program.cs)#
using Ocelot.DependencyInjection;
using Ocelot.Middleware;

var builder = WebApplication.CreateBuilder(args);

// 添加Ocelot并加载配置文件
builder.Configuration.AddJsonFile("ocelot.json", optional: false, reloadOnChange: true);
builder.Services.AddOcelot(builder.Configuration);

builder.Services.AddControllers();
builder.Services.AddEndpointsApiExplorer();
builder.Services.AddSwaggerGen();

var app = builder.Build();

if (app.Environment.IsDevelopment())
{
    app.UseSwagger();
    app.UseSwaggerUI();
}

app.UseHttpsRedirection();

app.UseAuthorization();

app.MapControllers();

// Ocelot中间件必须在UseRouting之后
await app.UseOcelot();

app.Run();
ocelot.json配置文件#
{
  "Routes": [
    // 用户服务路由
    {
      "DownstreamPathTemplate": "/api/users/{everything}",
      "DownstreamScheme": "http",
      "DownstreamHostAndPorts": [
        {
          "Host": "apiuser",
          "Port": 8080
        }
      ],
      "UpstreamPathTemplate": "/users/{everything}",
      "UpstreamHttpMethod": [ "GET", "POST", "PUT", "DELETE" ]
    },
    // 管理服务路由
    {
      "DownstreamPathTemplate": "/api/Admins/{everything}",
      "DownstreamScheme": "http",
      "DownstreamHostAndPorts": [
        {
          "Host": "apiadmin",
          "Port": 8080
        }
      ],
      "UpstreamPathTemplate": "/Admins/{everything}",
      "UpstreamHttpMethod": [ "GET", "POST", "PUT", "DELETE" ]
    },
    // Todo服务路由
    {
      "DownstreamPathTemplate": "/api/Todos/{everything}",
      "DownstreamScheme": "http",
      "DownstreamHostAndPorts": [
        {
          "Host": "apitodo",
          "Port": 8080
        }
      ],
      "UpstreamPathTemplate": "/Todos/{everything}",
      "UpstreamHttpMethod": [ "GET", "POST", "PUT", "DELETE" ]
    }
  ],
  "GlobalConfiguration": {
    "BaseUrl": "http://localhost:5106"
  }
}
Dockerfile(对应系统)#
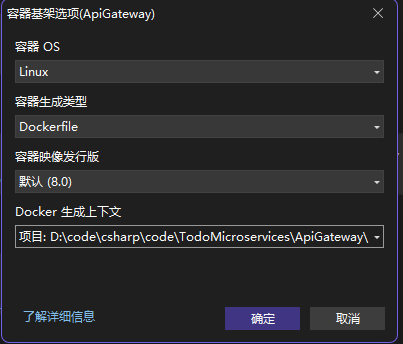
# 请参阅 https://aka.ms/customizecontainer 以了解如何自定义调试容器,以及 Visual Studio 如何使用此 Dockerfile 生成映像以更快地进行调试。

# 此阶段用于在快速模式(默认为调试配置)下从 VS 运行时
FROM mcr.microsoft.com/dotnet/aspnet:8.0 AS base
USER $APP_UID
WORKDIR /app
EXPOSE 8080
EXPOSE 8081


# 此阶段用于生成服务项目
FROM mcr.microsoft.com/dotnet/sdk:8.0 AS build
ARG BUILD_CONFIGURATION=Release
WORKDIR /src
COPY ["ApiGateway.csproj", "."]
RUN dotnet restore "./ApiGateway.csproj"
COPY . .
WORKDIR "/src/."
RUN dotnet build "./ApiGateway.csproj" -c $BUILD_CONFIGURATION -o /app/build

# 此阶段用于发布要复制到最终阶段的服务项目
FROM build AS publish
ARG BUILD_CONFIGURATION=Release
RUN dotnet publish "./ApiGateway.csproj" -c $BUILD_CONFIGURATION -o /app/publish /p:UseAppHost=false

# 此阶段在生产中使用,或在常规模式下从 VS 运行时使用(在不使用调试配置时为默认值)
FROM base AS final
WORKDIR /app
COPY --from=publish /app/publish .
ENTRYPOINT ["dotnet", "ApiGateway.dll"]
ApiUser(ApiTodo,ApiAdmin)#
Dockerfile(对应系统)#
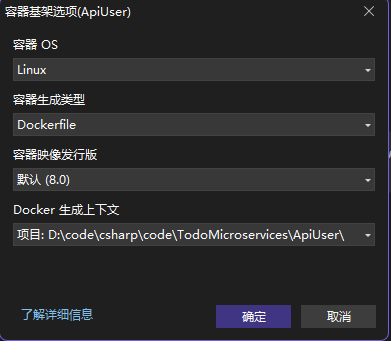
# 请参阅 https://aka.ms/customizecontainer 以了解如何自定义调试容器,以及 Visual Studio 如何使用此 Dockerfile 生成映像以更快地进行调试。

# 此阶段用于在快速模式(默认为调试配置)下从 VS 运行时
FROM mcr.microsoft.com/dotnet/aspnet:8.0 AS base
USER $APP_UID
WORKDIR /app
EXPOSE 8080
EXPOSE 8081


# 此阶段用于生成服务项目
FROM mcr.microsoft.com/dotnet/sdk:8.0 AS build
ARG BUILD_CONFIGURATION=Release
WORKDIR /src
COPY ["ApiUser.csproj", "."]
RUN dotnet restore "./ApiUser.csproj"
COPY . .
WORKDIR "/src/."
RUN dotnet build "./ApiUser.csproj" -c $BUILD_CONFIGURATION -o /app/build

# 此阶段用于发布要复制到最终阶段的服务项目
FROM build AS publish
ARG BUILD_CONFIGURATION=Release
RUN dotnet publish "./ApiUser.csproj" -c $BUILD_CONFIGURATION -o /app/publish /p:UseAppHost=false

# 此阶段在生产中使用,或在常规模式下从 VS 运行时使用(在不使用调试配置时为默认值)
FROM base AS final
WORKDIR /app
COPY --from=publish /app/publish .
ENTRYPOINT ["dotnet", "ApiUser.dll"]
docker-compose.yml#
docker-compose.yml在根目录
services:
  apigateway:
    build:
      context: ./ApiGateway
      dockerfile: Dockerfile
      args:
        BUILD_CONFIGURATION: Release
    ports:
      - "5106:8080"
    environment:
      - ASPNETCORE_URLS=http://+:8080
    depends_on:
      - apiuser
      - apiadmin
      - apitodo
    networks:
      - todo-network

  apiuser:
    build:
      context: ./ApiUser
      dockerfile: Dockerfile
      args:
        BUILD_CONFIGURATION: Release
    expose:
      - "8080"
    environment:
      - ASPNETCORE_URLS=http://+:8080
    networks:
      - todo-network

  apiadmin:
    build:
      context: ./ApiAdmin
      dockerfile: Dockerfile
      args:
        BUILD_CONFIGURATION: Release
    expose:
      - "8080"
    environment:
      - ASPNETCORE_URLS=http://+:8080
    networks:
      - todo-network

  apitodo:
    build:
      context: ./ApiTodo
      dockerfile: Dockerfile
      args:
        BUILD_CONFIGURATION: Release
    expose:
      - "8080"
    environment:
      - ASPNETCORE_URLS=http://+:8080
    networks:
      - todo-network

networks:
  todo-network:
    driver: bridge
启动步骤#
构建项目#
# 在各自项目目录下
dotnet publish -c Release -o ./bin/Release/net8.0/publish
单独构建测试#
cd ApiGateway
docker build -t api-gateway .
cd ApiUser
docker build -t user-service .
启动容器#
# 在解决方案根目录(docker-compose.yml所在目录)
# 验证配置
docker-compose config
# 启动
docker-compose up -d
验证服务#
访问网关:http://localhost:5106/users (应路由到 UserService 的 /api/users/Get)
查看日志:
docker-compose logs -f api-gateway
调试#
docker exec -it todomicroservices-apiuser-1 sh -c "apt-get update && apt-get install -y curl && curl http://apiuser:8080/api/users/Get"
注意事项#
[!IMPORTANT] Docker Compose 服务名、Ocelot 路由配置中的下游 Host 名、代码中调用的服务名这三者必须完全一致。
具体要保持一致的字段#
docker-compose.yml 中的服务名(Service Name)
services:
  apigateway:   # 网关服务名
    ...
  apiuser:      # 用户服务名
    ...
这是 Docker 内部网络中其他容器用来访问这个服务的主机名(hostname)。
比如:http://apiuser:8080 就是通过 apiuser 这个名字找到对应容器。
✅ 必须与 Ocelot 配置文件中的 DownstreamHost 一致!
Ocelot 的 ocelot.json 文件中的 DownstreamHostAndPorts.Host
{
  "DownstreamPathTemplate": "/api/users/{everything}",
  "DownstreamScheme": "http",
  "DownstreamHostAndPorts": [
    {
      "Host": "apiuser",     // ← 必须和 docker-compose.yml 中的服务名一致
      "Port": 8080
    }
  ],
  ...
}
Ocelot 是一个反向网关,它会根据这个 Host 去内部 Docker 网络查找对应服务。
如果不一致,Ocelot 找不到服务,返回 502 或 Connection Refused。
代码中调用下游服务的 URL(如果有的话) 比如你在网关或其他服务中使用 HttpClient 请求另一个服务:
var response = await _httpClient.GetAsync("http://apiuser:8080/api/users");
这里的 apiuser 也必须和 docker-compose.yml 中定义的服务名一致。
否则容器间通信失败。
depends_on: 字段中的服务名也要一致
depends_on:
  - apiuser
表示当前服务(比如 apigateway)依赖 apiuser 服务先启动。
名字写错会导致依赖关系失效。
🧠 其他需要注意的一致性点
类别 |
说明 |
|---|---|
端口一致性 |
Ocelot 配置中 DownstreamHostAndPorts.Port 和服务实际监听的端口要一致(比如都用了 8080) |
Ocelot 的 BaseUrl |
应该和网关暴露的外部地址一致: |
UpstreamPathTemplate 和客户端请求路径匹配 |
客户端访问 /users/xxx,Ocelot 才会转发到 /api/users/xxx |
服务名称大小写敏感 |
Docker Compose 不允许大写,一律小写(如 apiuser ✔️,不能是 ApiUser ❌) |
✅ 最佳实践建议
地方 |
推荐命名 |
|---|---|
Docker Compose 服务名 |
apigateway, apiuser, orderservice |
Ocelot 下游 Host |
同上 |
HttpClient 调用地址 |
同上 |
UpstreamPathTemplate |
/users/{everything} |
DownstreamPathTemplate |
/api/users/{everything} |
BaseUrl |
http://localhost:5106 (网关对外暴露的地址) |
📋 示例总结表
配置位置 |
应该保持一致的值 |
|---|---|
docker-compose.yml 服务名 |
apiuser |
ocelot.json DownstreamHostAndPorts.Host |
apiuser |
HttpClient 请求地址 |
http://apiuser:8080/api/users |
depends_on 依赖项 |
apiuser |
Ocelot DownstreamPort |
8080(与服务监听端口一致) |
Ocelot UpstreamPathTemplate |
/users/{everything} |
Ocelot BaseUrl |
http://localhost:5106 |
ASP.NET Core 的路由大小写敏感性